About me
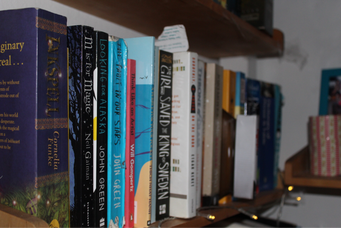
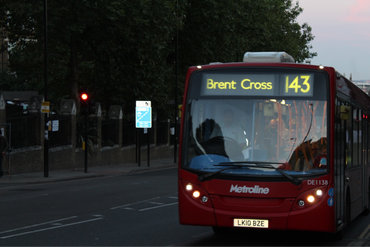
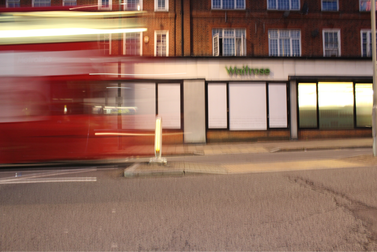
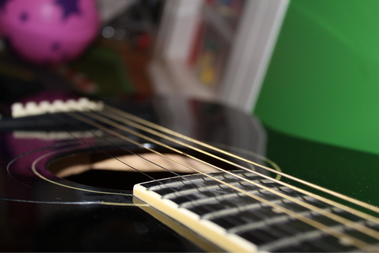
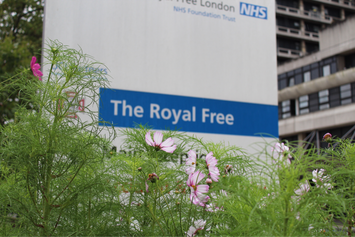
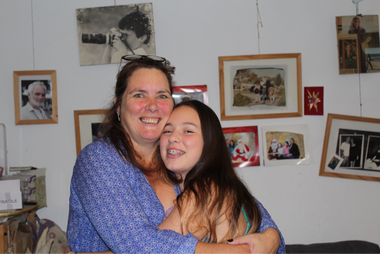
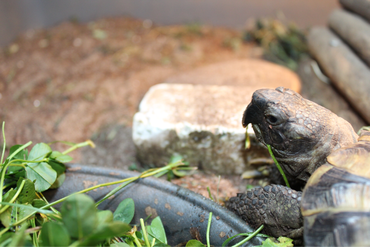
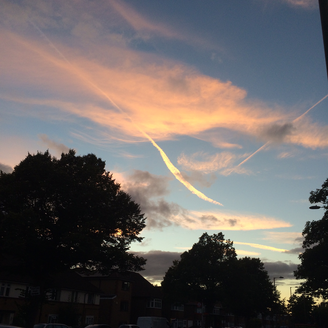
For this task we were asked to take photos of things that inspire us and show who we are. I mainly took photos of things that show who I am such as the books, my pet tortoise and my guitar. Two things that inspire me are the photos of the hospital and my family. The hospital is because I want to be a nurse when I'm older and my family is because they inspire me. A theme of things that I like to take photos of are contrasting light and dark. For example the photo of the lamp post at night and the two pictures of buses. These are my two favourite photos of the ten. I like the one of the hospital as the main focus of the photo are the flowers and I like taking photos of nature. I also like the photo of my family as in the background there are framed photos of other generations that have inspired me to study photography.
For this task we were asked to take photos of things that inspire us and show who we are. I mainly took photos of things that show who I am such as the books, my pet tortoise and my guitar. Two things that inspire me are the photos of the hospital and my family. The hospital is because I want to be a nurse when I'm older and my family is because they inspire me. A theme of things that I like to take photos of are contrasting light and dark. For example the photo of the lamp post at night and the two pictures of buses. These are my two favourite photos of the ten. I like the one of the hospital as the main focus of the photo are the flowers and I like taking photos of nature. I also like the photo of my family as in the background there are framed photos of other generations that have inspired me to study photography.


|
History of Photography
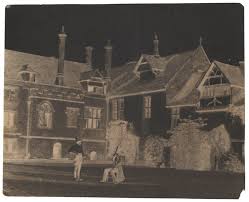
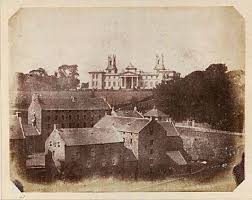
Throughout the 16th century convex mirror and lenses developed in order to present photos and pictures with more perspective compared to what artists created beforehand. This obsession led to scientists and artists inventing the camera obscura. This was a dark room, that was mobile, that had a small hole in one wall. This pin-pointed the light and projected a still image of the outside on the opposite wall which meant artists could then trace this still image onto a canvas and create a more realistic and precise image of real life. As inventions developed, the camera lucida was produced which was very similar to the camera obscura however it was smaller and easier to transport. The camera lucida worked by having an eyehole that meant you could look down at how you were drawing and look ahead and who/what you were drawing. This was considered a camera as it was documenting an image in front of you however the camera obscura was more accurate. This also led to the camera obscura becoming more popular. Before the industrial revolution in 1724, Johann Heinrich Schulze discovered that sunlight reacts with silver nitrate to produce an image. However this image soon fades and is lost forever. As the 19th century began and the industrial revolution started, people became more obsessed over having reality in a fixed form. In 1827, scientist Joseph Niépce adopted Schulze's idea to create the first Heliograph. He used light and silver nitrate and exposed it for several days in order to create an image which was fixed. This was an image of his view from his window in the South of France. You can see in the image how the light has bounced off the two main buildings in it. Niépce wanted to adapt his method in order to make the processing time quicker and so that it could be a mobile process. He worked closely with his friend Louis Jacques Daguerre who was a painter of stage sets and illusionistic scenery for The Diorama. After Niépce died, Daguerre continued his work and in 1839, created and announced to the world of his invention of the Daguerreotype. This photograph was printed on a metal plate and was monochromatic and laterally revered. At a similar time William Henry Fox Talbot, an English scientist invented another type of photograph called the calotype which was in one aspect better than the daguerreotype as it could be reproduced as a negative rather than one single image. Talbot's was superior in terms of mass production as well however compared to the daguerreotype it was less sharp and had a worse overall quality. Also America and European countries had already adapted Daguerre's way and weren't ready to change their ways of taking photos. The development of photography relies largely on the industrial revolution as his was a time of change in the aspect of technology. This meant that wishes from the 16th century to create fixed forms of reality were able to come true as there was new technology and new ways of making things. Early photography was very similar to fine art of the time. It was hard for photography to develop its own themes when the world was still mainly using fine art. This means that many early photographs are of families, other portraits and traditional landscapes. Artists weren't necessarily confused about how to define photography but weren't sure whether it could be classed as art or not. In the 19th century there was a dialect about the history of photography. This was between photography emerging as a separate business or as a medium of art. There was no established tradition of art for photography to compete with and after a while, letting art culture develop, photography is seen as a type of art. |

Diagram of the Camera Obscura. This shows how the normal everyday was captured and artists were able to trace the image.
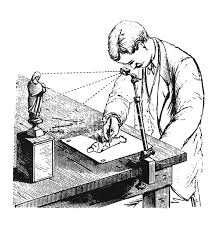
Diagram of the Camera Lucida. This was easier as the you could look directly at what you had to draw while drawing it.
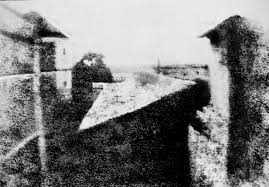
Joseph Niepce's first heliograph of his view from his window. In this you can see two houses and the gap between them.
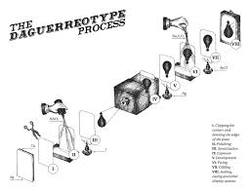
This shows the process of Daguerre's Daguerrotype which was seen as one of the first camera's.
This shows John Fox Talbot's calotype and how he turned a negative to a positive.
|
The photograph, Chapter 1:
This Chapter discussing what we studied earlier- the history of photography. It talk about Daguerre and Talbot and how they're work led to the photographs we have and take today. While reading this it questioned whether a photo gram can be classed as a photograph and as we're currently making these in class it's a wondering concept to think about. I believe that photographs can be counted as a photograph as it's something that captures light and produces an image. Linking to this it then goes on to question simply; what is a photograph? "At its most basic level, a picture likeness of facsimile obtained by photography." However a photograph is also based in the social, historical and cultural context behind the photograph being taken. I believe that anything can be classed as a photo as long as it has captured light in some way but there are different categories that photographs can go under- another topic discussed in this chapter-some can be considered art while some are considered documents. Lastly, the way a photograph is presented, and the meaning behind this, is also discussed. In this section Graham Clarke explains that the size of the photo presented to us changes the meaning as does the colour. Black and white creates a more serious atmosphere while colour creates a more playful mood. This is something that I will think about when presenting my own photos and what kind of mood I want to convey and which size will fit best with the photo I am presenting.
This Chapter discussing what we studied earlier- the history of photography. It talk about Daguerre and Talbot and how they're work led to the photographs we have and take today. While reading this it questioned whether a photo gram can be classed as a photograph and as we're currently making these in class it's a wondering concept to think about. I believe that photographs can be counted as a photograph as it's something that captures light and produces an image. Linking to this it then goes on to question simply; what is a photograph? "At its most basic level, a picture likeness of facsimile obtained by photography." However a photograph is also based in the social, historical and cultural context behind the photograph being taken. I believe that anything can be classed as a photo as long as it has captured light in some way but there are different categories that photographs can go under- another topic discussed in this chapter-some can be considered art while some are considered documents. Lastly, the way a photograph is presented, and the meaning behind this, is also discussed. In this section Graham Clarke explains that the size of the photo presented to us changes the meaning as does the colour. Black and white creates a more serious atmosphere while colour creates a more playful mood. This is something that I will think about when presenting my own photos and what kind of mood I want to convey and which size will fit best with the photo I am presenting.
Photograms
In class we have been making Photograms. These are when you take light sensitive paper and place it under an enlarger with objects on top of it so some of the light can't reach the a paper so a picture is formed. To make the image visible you need to place it in developing mixture which are chemicals which form the image to appear on the paper. You then place it in stop mixture, then stop and then you wash it so that when you take it out of the darkroom they don't get over exposed.
When setting up your photogram you need to make sure that the red light cover is over your bulb so that you can make sure you're setting up the photo in the right area. This also means that the photo doesn't get over exposed before the objects are in place.
My first photogram which is the one on the left didn't go that well as I put it in the developer at different times and din't agitate the chemical. This created the cloudy effect on the photo and made less contrast between where the light reached the paper and where it didn't. However in some cases this effect could be very effective.
|
My second photogram went much better as I got the right amount of exposure time and put it into the developer correctly and for the right amount of time. All of this makes the objects look really crisp and sharp.
|
Test Strips
Each day you go into the darkroom it's a different temperature and the enlarger has been used a different amount of time on that day. This means that before you do a photogram you need to check how long is the right time to leave the paper under the enlarger. You can do this by making a test strip. This is where you get a small strip of paper and lace the objects you want to use on it. You then get a piece of card and cover a small section of it for 1 second. You then show more of the card and again expose it for 1 second. You keep on doing this so in total you have exposed the first section for 5 seconds. Then you develop it as usual and when it's taken out of the darkroom you should be able to see a gradient from white to black which tells you how long is the right time to expose it for on that day.
Each day you go into the darkroom it's a different temperature and the enlarger has been used a different amount of time on that day. This means that before you do a photogram you need to check how long is the right time to leave the paper under the enlarger. You can do this by making a test strip. This is where you get a small strip of paper and lace the objects you want to use on it. You then get a piece of card and cover a small section of it for 1 second. You then show more of the card and again expose it for 1 second. You keep on doing this so in total you have exposed the first section for 5 seconds. Then you develop it as usual and when it's taken out of the darkroom you should be able to see a gradient from white to black which tells you how long is the right time to expose it for on that day.
This test strip, even at the darkest level, is too bright. This was partly because I don't think I did enough different exposures but also because this test strip is on the photo I took from a pinhole camera. This means that it was hard, when taking the photo, to expose it for the right amount of time.
|

This test strip was done fully in the dark room so was easier to control the amount of light and the amount of time each section was exposed to. With this one I can tell that for these objects the best amount of time to leave this under the enlarger for would be 3 seconds.
|
Double Exposure
Double exposures mean that some parts of the paper where objects were are more contracting then others. For a double exposure you place your objects in a certain composition and only expose it for half the time you would normally. You can do this by either setting the timer on your enlarger for the time you want or if the timer doesn't work, you can count the time yourself. You then, once the light has turned off and without moving the paper itself, move the objects to their new position. Again, then you expose it for half the time and then put it through the chemicals like normal.
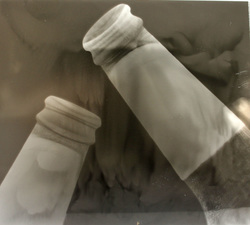
Below are two photograms i made using the double exposure technique. For the first one I slightly moved the bottle so that it overlayed itself. I did this for the pegs and the fan as well however not as subtly. For the second one I removed the fan compeltely out of the picture for the second half of the photo so it's image is slightly faded.
Double exposures mean that some parts of the paper where objects were are more contracting then others. For a double exposure you place your objects in a certain composition and only expose it for half the time you would normally. You can do this by either setting the timer on your enlarger for the time you want or if the timer doesn't work, you can count the time yourself. You then, once the light has turned off and without moving the paper itself, move the objects to their new position. Again, then you expose it for half the time and then put it through the chemicals like normal.
Below are two photograms i made using the double exposure technique. For the first one I slightly moved the bottle so that it overlayed itself. I did this for the pegs and the fan as well however not as subtly. For the second one I removed the fan compeltely out of the picture for the second half of the photo so it's image is slightly faded.

|
|
I quite like the effect that this technique has on the photograms. I think both of these photograms worked quite well as the background for both is very dark which is how it's meant to be. This also means that even when some of the objects because they've been moved it still contrasts with the background which produces a sharp image.
Painting on the developer
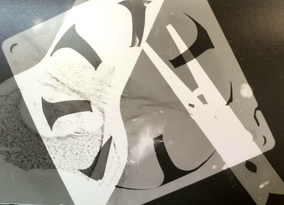
Usually when developing a photo in the dark room you try and place the whole image in one go into the developer so you get a crisp image at the end rather than a foggy one. However another technique you can do is to paint or splash on the developer so that not all of it develops. After this you leave it for 2 minutes before placing it in the stop mixture followed by the fix mixture. For this technique you place your objects and paper under the enlarger for thee full amount of time.
The first image below I splatted the developer on to the paper which produced a very chaotic image. This was also due to the fact one of my objects was a net which was placed in the top left corner so already created a splatted effect.
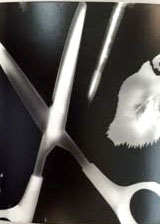
With the second image below I took a more organised route and painted a criss-crossed/ woven pattern onto my paper. This made it seem like a full image as one of my objects was a fan with a square border so the areas that weren't developed your eye could fill in and guess where the image stopped and started. This also worked with the scissors as one of the squares that wasn't painted on fell into the whole in the scissor handle.
Usually when developing a photo in the dark room you try and place the whole image in one go into the developer so you get a crisp image at the end rather than a foggy one. However another technique you can do is to paint or splash on the developer so that not all of it develops. After this you leave it for 2 minutes before placing it in the stop mixture followed by the fix mixture. For this technique you place your objects and paper under the enlarger for thee full amount of time.
The first image below I splatted the developer on to the paper which produced a very chaotic image. This was also due to the fact one of my objects was a net which was placed in the top left corner so already created a splatted effect.
With the second image below I took a more organised route and painted a criss-crossed/ woven pattern onto my paper. This made it seem like a full image as one of my objects was a fan with a square border so the areas that weren't developed your eye could fill in and guess where the image stopped and started. This also worked with the scissors as one of the squares that wasn't painted on fell into the whole in the scissor handle.
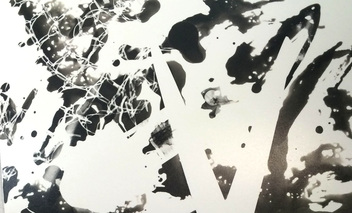
I think this one worked very well as the fact that I splashed on the developer really fits with the objects which I placed on the paper when i exposed the paper to light. I also think that I let the developer stay on the photogram for the right amount of time as the bits which are developed are very dark.
|

I think this one worked less well than the first one. I do like how I painted on the developer and how even though not all of the object was developed you can still make out what the objects are. However there are parts where developer was placed onto the paper but it didn't develop completely and went grey.
|
Solarisation
Solaristaion/solarising is where you develop your paper with objects on it for the normal amount of time. you then place it in the developer and keep looking at it until you start to see an image form at which point you take it out of the developer and expose it to light for another 2/3 seconds. You then place it back in the developer for the whole 2 minutes and the process follows as normal. What this means is the area with no object develops to black, the area where the objects once were go slightly grey and then the outline of the objects create a silver lining. This is because once put in the developer and back into the light, the silver nitrates in the paper spasm and don't develop fully so create an outline of your objects.
Solaristaion/solarising is where you develop your paper with objects on it for the normal amount of time. you then place it in the developer and keep looking at it until you start to see an image form at which point you take it out of the developer and expose it to light for another 2/3 seconds. You then place it back in the developer for the whole 2 minutes and the process follows as normal. What this means is the area with no object develops to black, the area where the objects once were go slightly grey and then the outline of the objects create a silver lining. This is because once put in the developer and back into the light, the silver nitrates in the paper spasm and don't develop fully so create an outline of your objects.
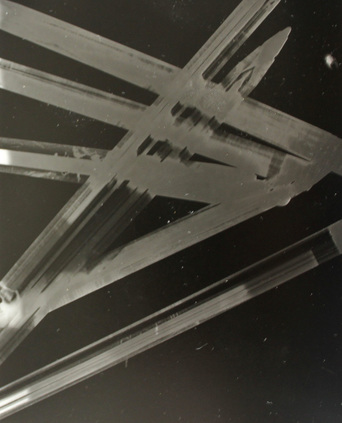
I think this technique worked quite well with these objects as they are made of clear plastic so already make the light act in a different way and when placed in the developer and then back under the light it makes a clear outline on the objects.
|
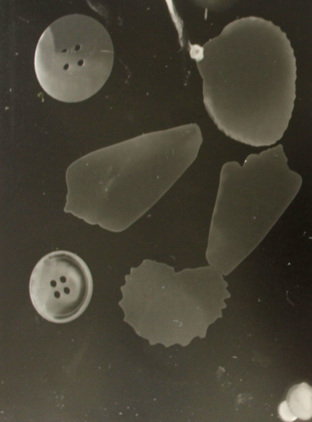
I don't think solarisation worked as well with these objects as they are quite flat and and hard to distinguish where the object ends and starts. I think it didn't work well for the shells however with the buttons it worked very well.
|
Sandwich Prints
Once you have created a photogram where the contrast between the objects and the black area is very crisp and clear you can create a sandwich print. This is where you place a new piece of light sensitive paper underneath your previously created photogram. When you turn on the light of the enlarger the light will travel through the area that is white that was where your objects were in your last photogram and the light will be blocked in the black area. This creates an opposite photogram to your original one.
Below is the sandwich print I did. On the left is the original photogram which I created in the darkroom and on the right is the sandwich print of this. I think for both these photos I got the exposure time and developing time correct as the image aren't too dark or too light. In the sandwich print of the image the edges of the objects are more fuzzy but I think this is because the light had to travel through a piece of paper in order to get to the that piece of paper.
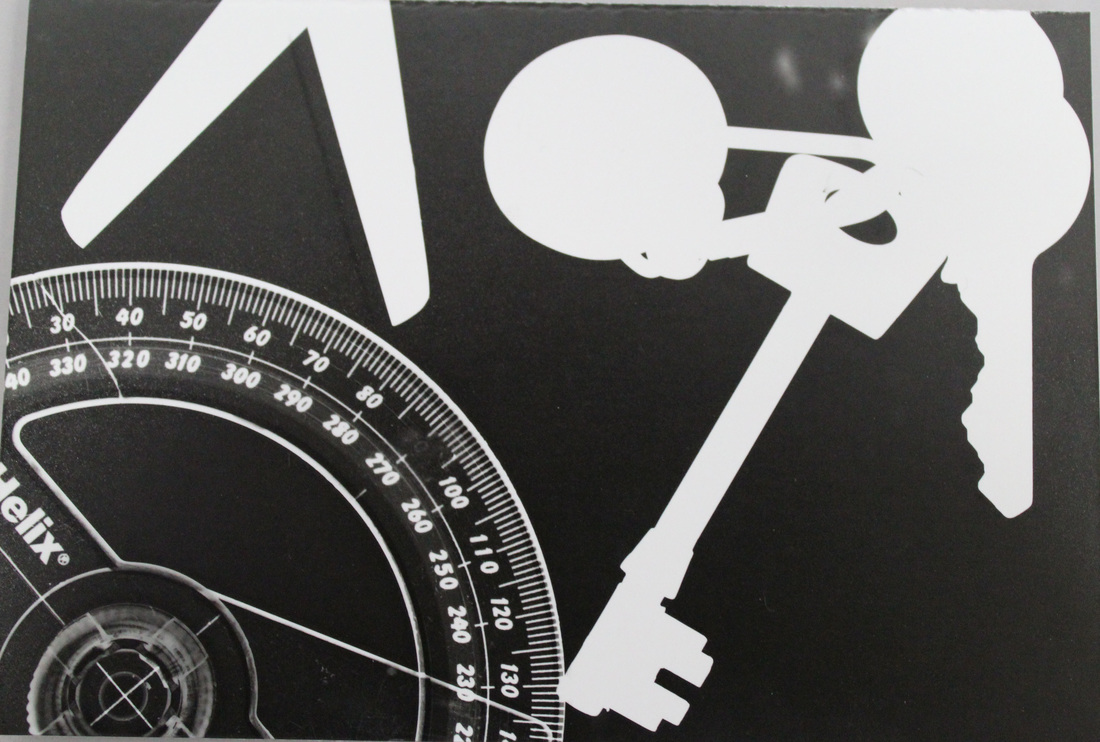
This is the original photogram. I decided to use this photogram as the contrast between the background and the objects in it is very crisp and I knew that in the process of making a sandwich print the contrast would decrease.
|
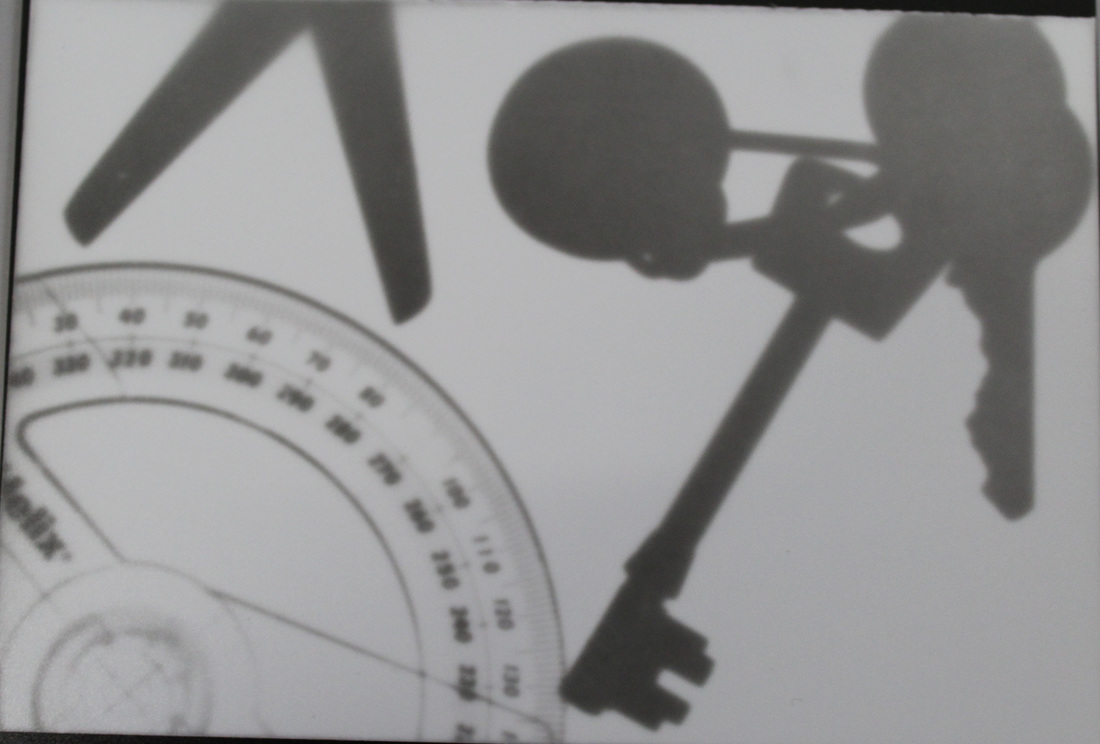
This is the sandwich print which I created. I think this went very well as you can still tell what the objects are and the objects are now black rather then white. Also, the contrast is still pretty good only the edges of the objects are slightly fuzzy rathe then a straight line.
|
Using Pinhole Camera's
Pinhole Camera's take the idea of a camera obscure but put it into a small portable camera. The way we made our pinhole camera's was by taking a Pringles camera and painting all of the inside and the lid black. Then you make a hole in the side of the can and stick time foil of this hole. Then you take a pin and make a very small hole in the foil so only a small amount of light enters the tin. When light sensitive paper is placed in the tin and the hole is exposed, the small amount of light that enters forms and image which you can then put in the developer mixture, stop and fix. Once this image is made you can do a sandwich print of it to create a positive image.
Pinhole Camera's take the idea of a camera obscure but put it into a small portable camera. The way we made our pinhole camera's was by taking a Pringles camera and painting all of the inside and the lid black. Then you make a hole in the side of the can and stick time foil of this hole. Then you take a pin and make a very small hole in the foil so only a small amount of light enters the tin. When light sensitive paper is placed in the tin and the hole is exposed, the small amount of light that enters forms and image which you can then put in the developer mixture, stop and fix. Once this image is made you can do a sandwich print of it to create a positive image.
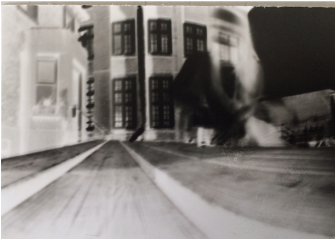
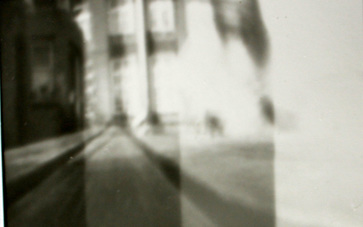
This is the original photo I took with the pinhole camera. I think this very well as you can see what's in it and the image is quite clear. The only problem is that the person in this photo moved slightly while I exposed the paper to light.
|
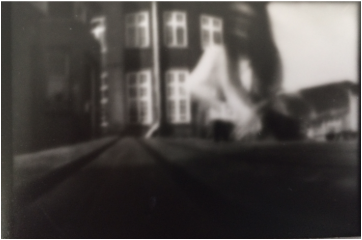
This is the sandwich print that I made of my pinhole camera image which turns it into a positive image. I think this went okay as you can see the objects and you can see that it's a reflection of the original image however I think I exposed it to light for too long as it's a bit to dark.
|
Digital SLR
DSLR stand for digital single lens reflex camera and it's a camera which combines both the optics and the mechanisms of a single-lens reflex camera however instead of producing it onto photographic film it produces it with a digital imaging sensor. With DSLR camera's and SLR's you can change the aperture and shutter speed so that you get different lighting and focus for the camera however the difference between the two is that with DSLR you are able to look back on the photos you take really easily. This means you're able to find the right aperture and shutter speed for the photos you want to take.
Aperture
Changing the aperture changes the amount of light let into the camera. Letting more light in means that the photo will be darker and letting less light in creates a lighter photo. The apertures you can have range from F4.5-F32.
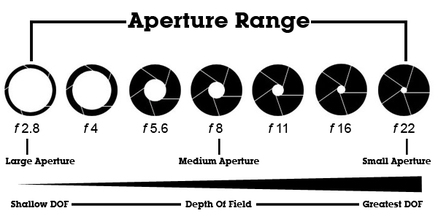
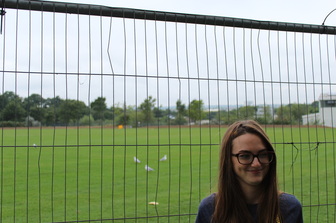
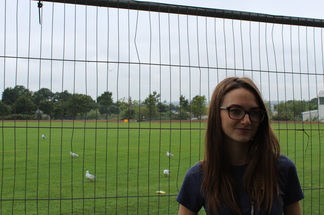
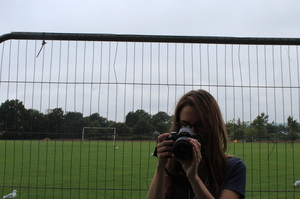
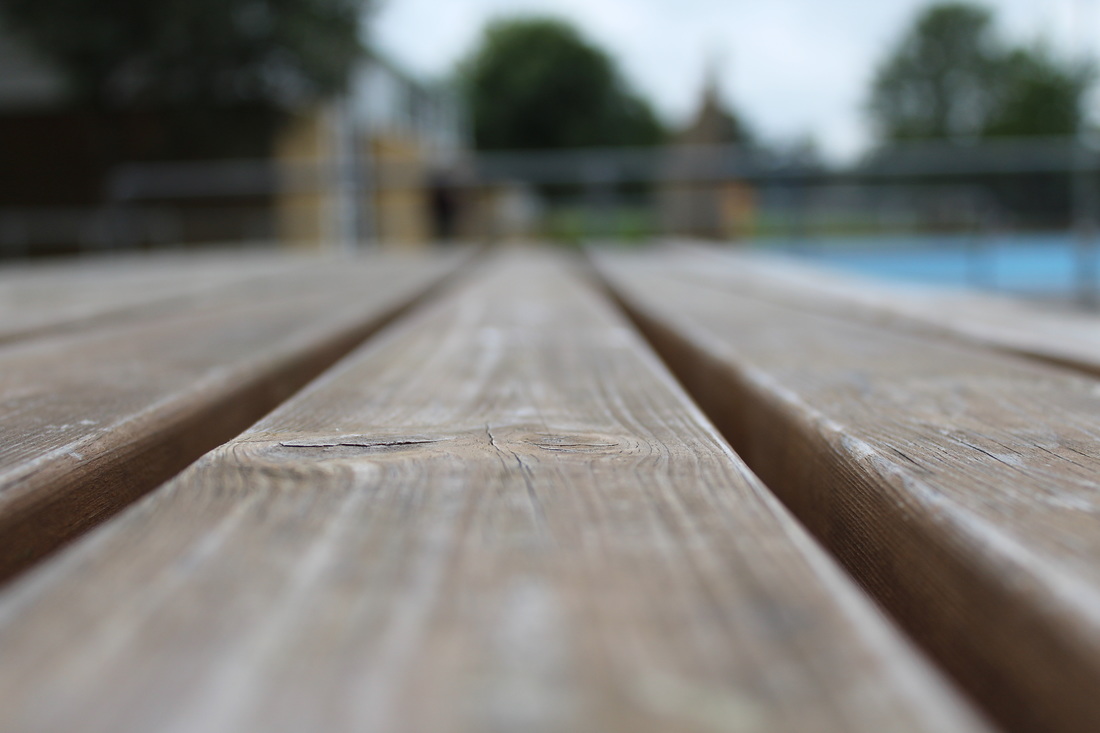
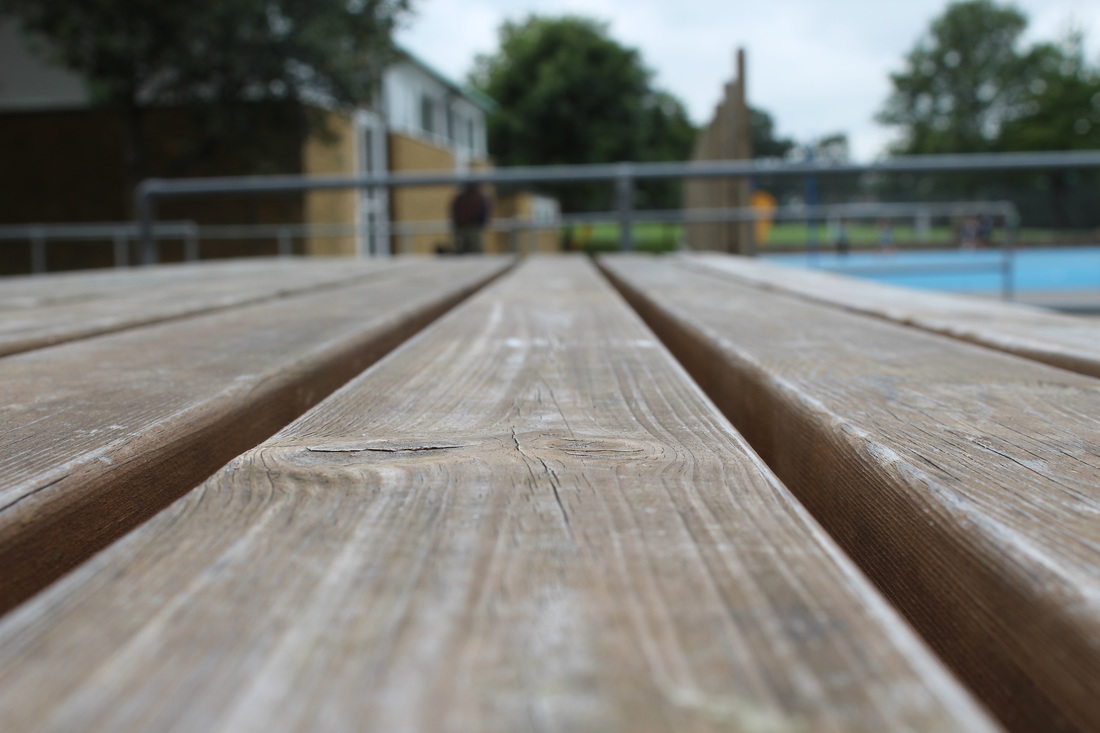
I went out and and took photos with different apertures to see how it affected the photo. The first photo I took I used an aperture of F4.5, for the second photo I used F11 and for the third one i used F29. You can see that as you make the aperture smaller and less light in the photo itself becomes darker and the bigger the hole for the camera, so when more light is let in, the photo is brighter. I think, for this photo, the best aperture is F4.5 as there are no shadows on her face and you can see all her features as well as the background.
|
|
|
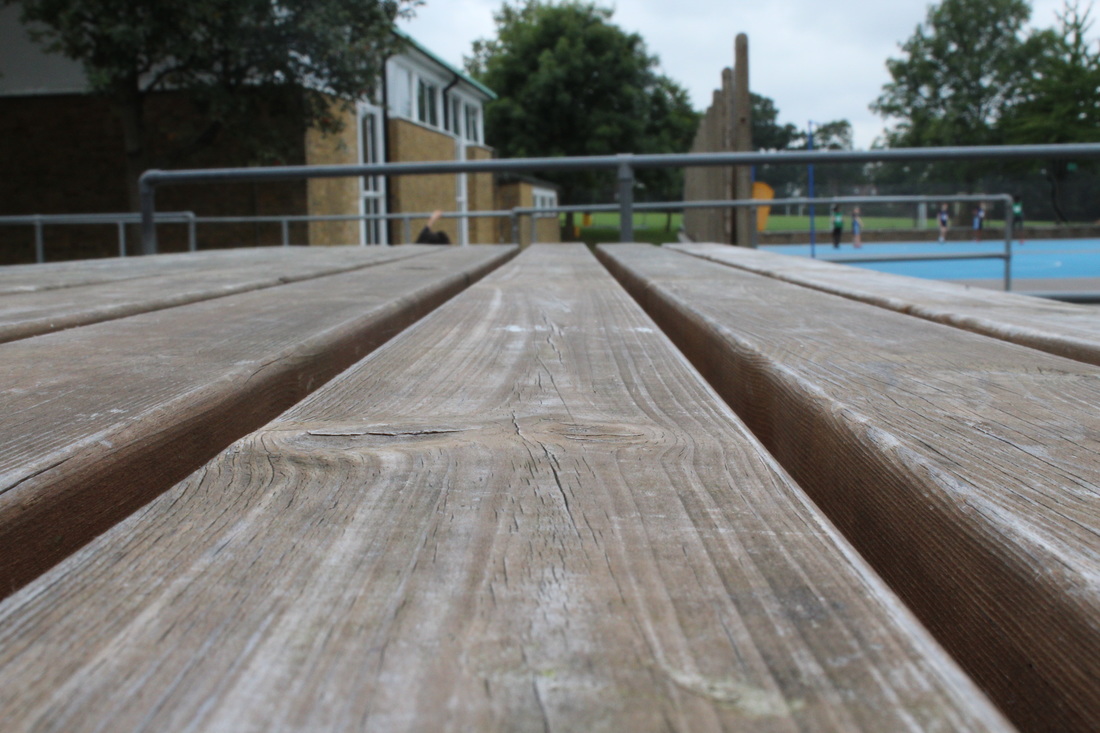
I took another set of photos with different apertures however this time it was a landscape photo rather then a portrait. When taking landscape photo with different apertures, one thing I noticed was that the focus of the photo got more broad when the aperture increased. As you go from left to right, with the photos below, the aperture decreases in size from F4.5 to F11 and finally to F29. As you can see as the aperture got smaller the background got more and more in focus and it wasn't blurred.
|
|
|
Shutter Speed
Shutter speed changes the amount of time the digital imaging sensor, for DSLR's, is exposed to light. This means that if the shutter speed is quite low and you're trying to capture a moving object then it'll be blurred. To capture a moving object you need to se the shutter speed very low so that the imaging sensor is only exposed to light for a very short period of time.
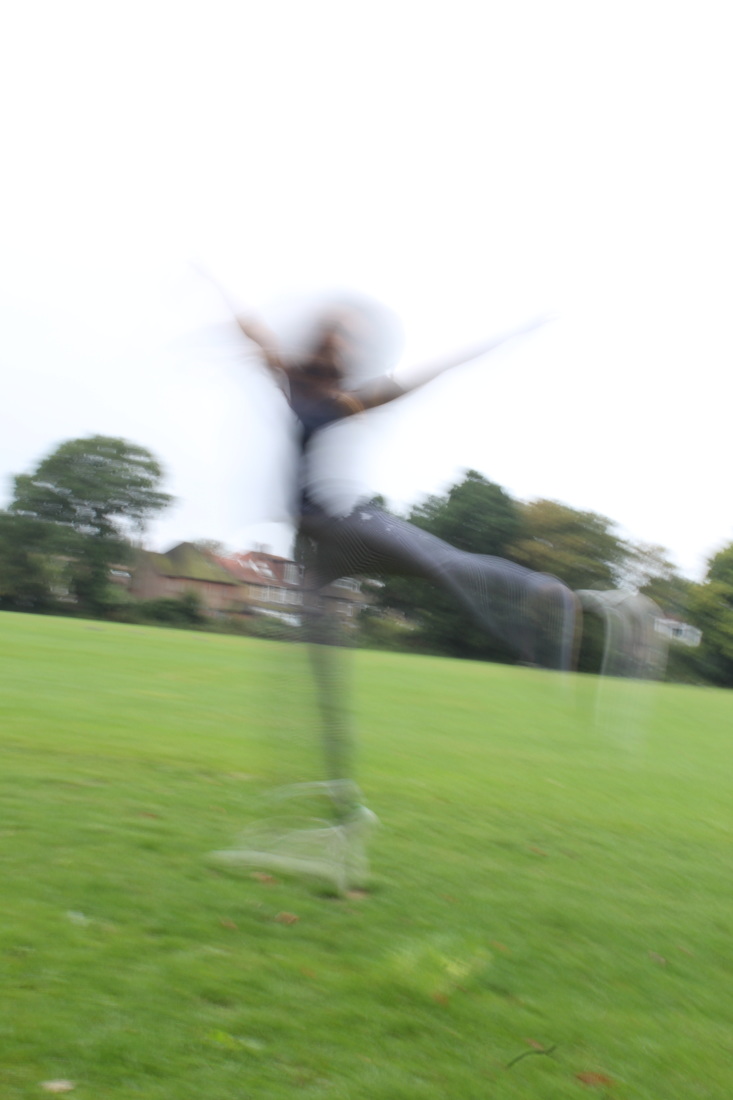
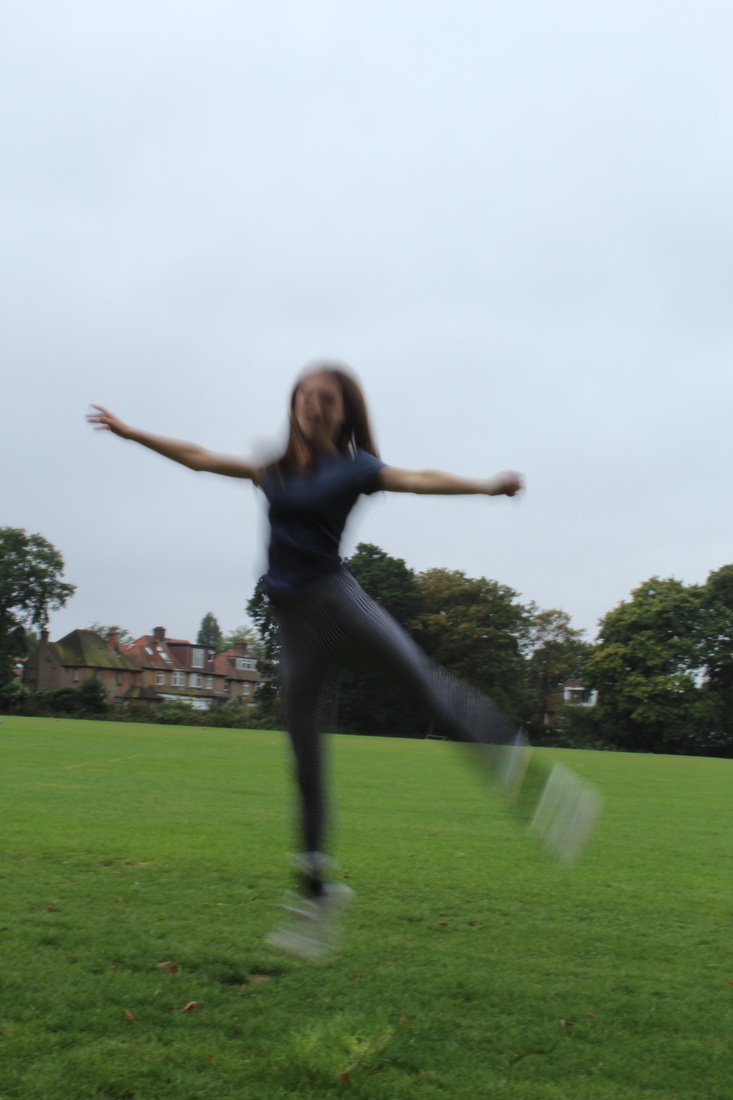
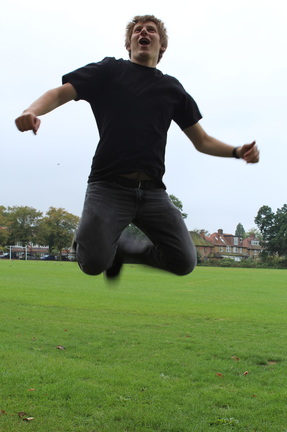
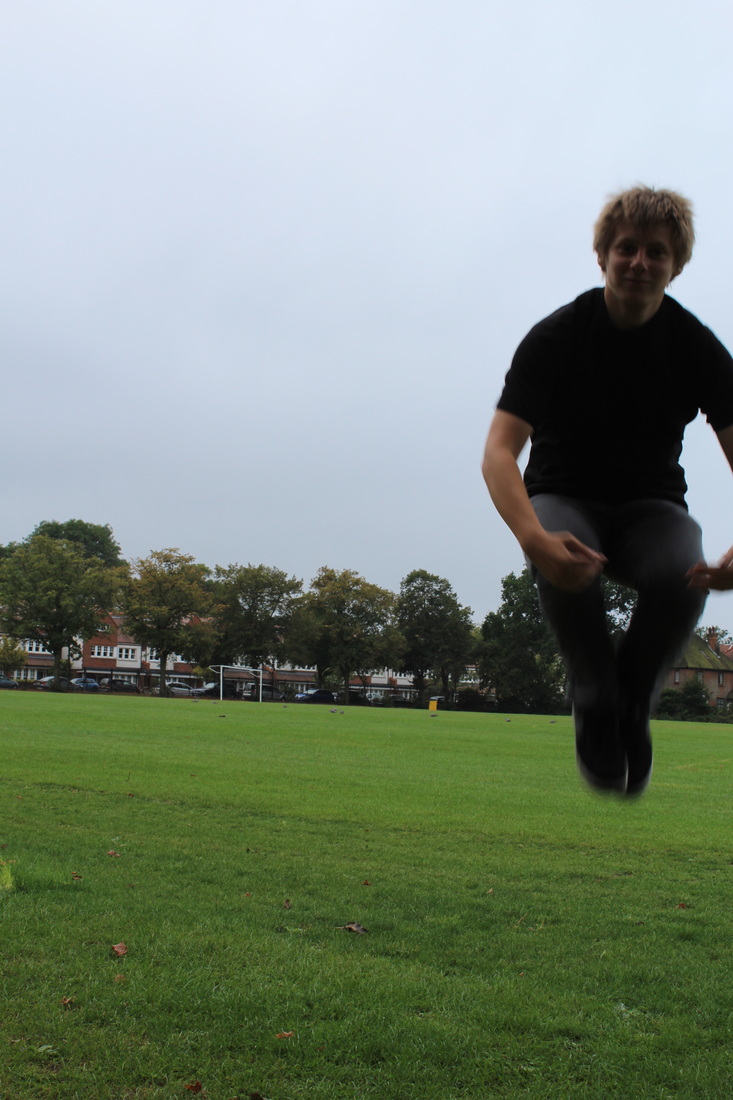
Again as it's on a digital camera we were able to play around with different shutter speed to work out which would be the best to use for a moving object however when you manually set the shutter speed the aperture automatically sets so the brightness of these photos wasn't controlled by me. To test this we got a friend to jump in front of the camera. The first shutter speed was 1/4, the second was 1/13, the third was 1/80 and the fourth was 1/100. These number means the amount of pictures taken per second.
For a moving object the ideal shutter speed is between 1/80 and 1/100. This is because the person jumping is in focus, apart from the feet. In the first two photos the shutter speed was too slow to capture a still image.
Shutter speed changes the amount of time the digital imaging sensor, for DSLR's, is exposed to light. This means that if the shutter speed is quite low and you're trying to capture a moving object then it'll be blurred. To capture a moving object you need to se the shutter speed very low so that the imaging sensor is only exposed to light for a very short period of time.
Again as it's on a digital camera we were able to play around with different shutter speed to work out which would be the best to use for a moving object however when you manually set the shutter speed the aperture automatically sets so the brightness of these photos wasn't controlled by me. To test this we got a friend to jump in front of the camera. The first shutter speed was 1/4, the second was 1/13, the third was 1/80 and the fourth was 1/100. These number means the amount of pictures taken per second.
For a moving object the ideal shutter speed is between 1/80 and 1/100. This is because the person jumping is in focus, apart from the feet. In the first two photos the shutter speed was too slow to capture a still image.
|
|
|
|
Film Camera's
When using film cameras you are unable to see the photos you have taken and whether the aperture and shutter speed used are correct. This means when taking photos on a film camera you need to take a few photos of the same things with different settings so that when developed you get the photo that you want. After your photos have been taken you need to develop the film in your camera.
Developing film camera:
1) Take your film out of the camera and in the darkroom, without the red light, thread it onto a pool with the shiny side up. To do this hold one side still and move the rhee side back and forth.
2) Once all the film is on the spool you have to put it in the developing tank and then put a funnel and a lid on top before turning the light on.
3) The first chemical you put into the tank is film developer which has the ratio of 30 ml of developer to 270 ml of water. You keep this in the tank for 7 minutes. For the first 2 minutes you shake it- by turning. it upside down and then upright again- and ten do it every 30 seconds for the rest of the time. At the end of each shake you need to tap it on the sink to get rid of air bubbles.
3) You then pour this out into the sink and pour the fix chemicals into the tank, with the same ratios, and leave it in for 2 minutes shaking it consistently and tapping it.
4) This is recyclable so you can pour this chemical back in the bottle and replace it with stop chemicals, again the same ratios, and leave this in for 5 minutes and shake and tap it every 30 seconds.
5) You then rinse the film in cold water and then leave it in the drying cupboard.
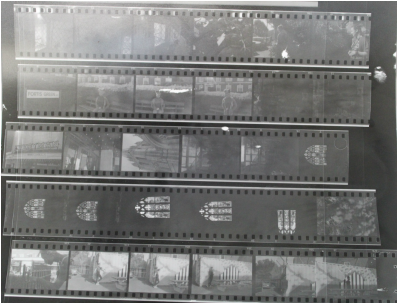
Contact Sheets:
A way that you can present all your photos you have taken and turned into positives on one sheet is to make a contact sheet. This is something that you can use to view your photos once they are positive and a way to choose which photo out of the ones you have taken you prefer and want to enlarge.
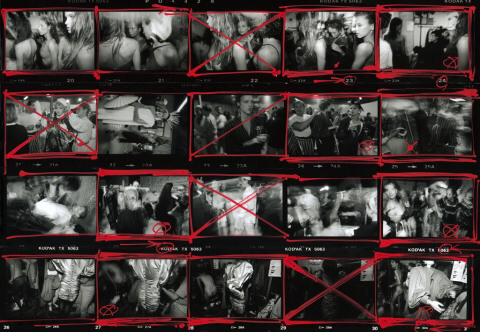
William Klein, a photographer who used film cameras for his photos believed that the contact sheet told a story; it showed you the process the artist has taken to get to the final photo that has been enlarged and produced largely. Below you can see one of Klien's contact sheets and which ones he deemed as a photograph and which didn't make it.
When using film cameras you are unable to see the photos you have taken and whether the aperture and shutter speed used are correct. This means when taking photos on a film camera you need to take a few photos of the same things with different settings so that when developed you get the photo that you want. After your photos have been taken you need to develop the film in your camera.
Developing film camera:
1) Take your film out of the camera and in the darkroom, without the red light, thread it onto a pool with the shiny side up. To do this hold one side still and move the rhee side back and forth.
2) Once all the film is on the spool you have to put it in the developing tank and then put a funnel and a lid on top before turning the light on.
3) The first chemical you put into the tank is film developer which has the ratio of 30 ml of developer to 270 ml of water. You keep this in the tank for 7 minutes. For the first 2 minutes you shake it- by turning. it upside down and then upright again- and ten do it every 30 seconds for the rest of the time. At the end of each shake you need to tap it on the sink to get rid of air bubbles.
3) You then pour this out into the sink and pour the fix chemicals into the tank, with the same ratios, and leave it in for 2 minutes shaking it consistently and tapping it.
4) This is recyclable so you can pour this chemical back in the bottle and replace it with stop chemicals, again the same ratios, and leave this in for 5 minutes and shake and tap it every 30 seconds.
5) You then rinse the film in cold water and then leave it in the drying cupboard.
Contact Sheets:
A way that you can present all your photos you have taken and turned into positives on one sheet is to make a contact sheet. This is something that you can use to view your photos once they are positive and a way to choose which photo out of the ones you have taken you prefer and want to enlarge.
William Klein, a photographer who used film cameras for his photos believed that the contact sheet told a story; it showed you the process the artist has taken to get to the final photo that has been enlarged and produced largely. Below you can see one of Klien's contact sheets and which ones he deemed as a photograph and which didn't make it.
Making a contact sheet:
Once your negatives have fully developed you need to cut them into rows of 6 and place them into a plastic sleeve. You then go into the dark room and, first of all make a test strip to see what time is best to create a positive photogram of your negatives. After you know what time you need, you place the whole plastic sleeve under the enlarger- so make sure the light is rolled up high so light covers the whole paper- and then expose it for the right amount of time and develop like usual.
Once your negatives have fully developed you need to cut them into rows of 6 and place them into a plastic sleeve. You then go into the dark room and, first of all make a test strip to see what time is best to create a positive photogram of your negatives. After you know what time you need, you place the whole plastic sleeve under the enlarger- so make sure the light is rolled up high so light covers the whole paper- and then expose it for the right amount of time and develop like usual.
Below is an image of my contact sheet. Most of the photos I took on the film camera were quite dark but then some were also very light so it was hard to produce a contact sheet where all of the photos had been developed for the right amount of time.
Final photo:
After your contact sheet has been made and you have chosen your favourite photo from all your negatives you can print this one so it's big. To do this you need to take the strip of negatives that your chosen one is in out of the plastic sheet and place it in the negative holder in the enlarger, shiny side up. Then you need to move your enlarger light back down so that the light covers less space but enough space to cover the size of light paper you are using. Then when there is no like paper underneath turn your knowledge on with the white light showing to see if your photo is in focus. To help you do his you can use a grain finder to look up close and tell how focused your enlarger is. You then need to create a test strip placing the strip of paper so that it covers as much of the difference in light and dark in the photo as possible. Once a successful test strip has been made you can create a full sized photo of your negative.
After your contact sheet has been made and you have chosen your favourite photo from all your negatives you can print this one so it's big. To do this you need to take the strip of negatives that your chosen one is in out of the plastic sheet and place it in the negative holder in the enlarger, shiny side up. Then you need to move your enlarger light back down so that the light covers less space but enough space to cover the size of light paper you are using. Then when there is no like paper underneath turn your knowledge on with the white light showing to see if your photo is in focus. To help you do his you can use a grain finder to look up close and tell how focused your enlarger is. You then need to create a test strip placing the strip of paper so that it covers as much of the difference in light and dark in the photo as possible. Once a successful test strip has been made you can create a full sized photo of your negative.
|
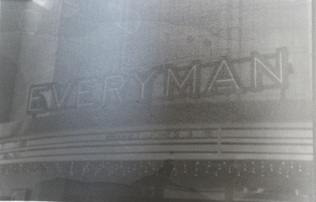
The first photo I developed from my contact sheet was the one on the right. I made a test strip to check the right developing time however when I developed it for that amount of time (it was meant to be 3 seconds) it was too dark. You can also see line on the photo which shows that I didn't slide the photo into the developer all at the same time.
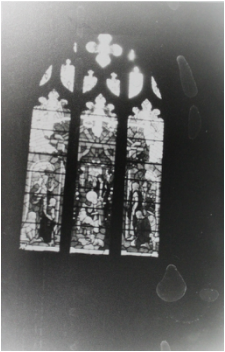
The next photo I decided to develop was the one of the stained glass window. Within this photo there were different sections of light and dark as there was light coming through the window. This meant that the top left corner was always less developed then the rest of the photo. However I think this benefited the photo as it made it seem more angelic and fitted the scene of this photo which was a church.
On the light sensitive photo there are a few smudges which could've been from the photo itself as the lens could've been dirty or it was on the actual paper. When I developed this photo again to try and get rid of the smudges they were still there so I think it was on the lens. |
|
